Trong quá trình SEO, khi các bạn làm Schema cho website thì thường có trường author, nhưng nhiều website không cho hiển thị trường tác giả. Vì vậy, các bạn cần phải code thêm cho website của mình để nó hiển thị trang tác giả. Sau đây, mình sẽ hướng dẫn các bạn tạo hiển thị trang tác giả như hình dưới đây:
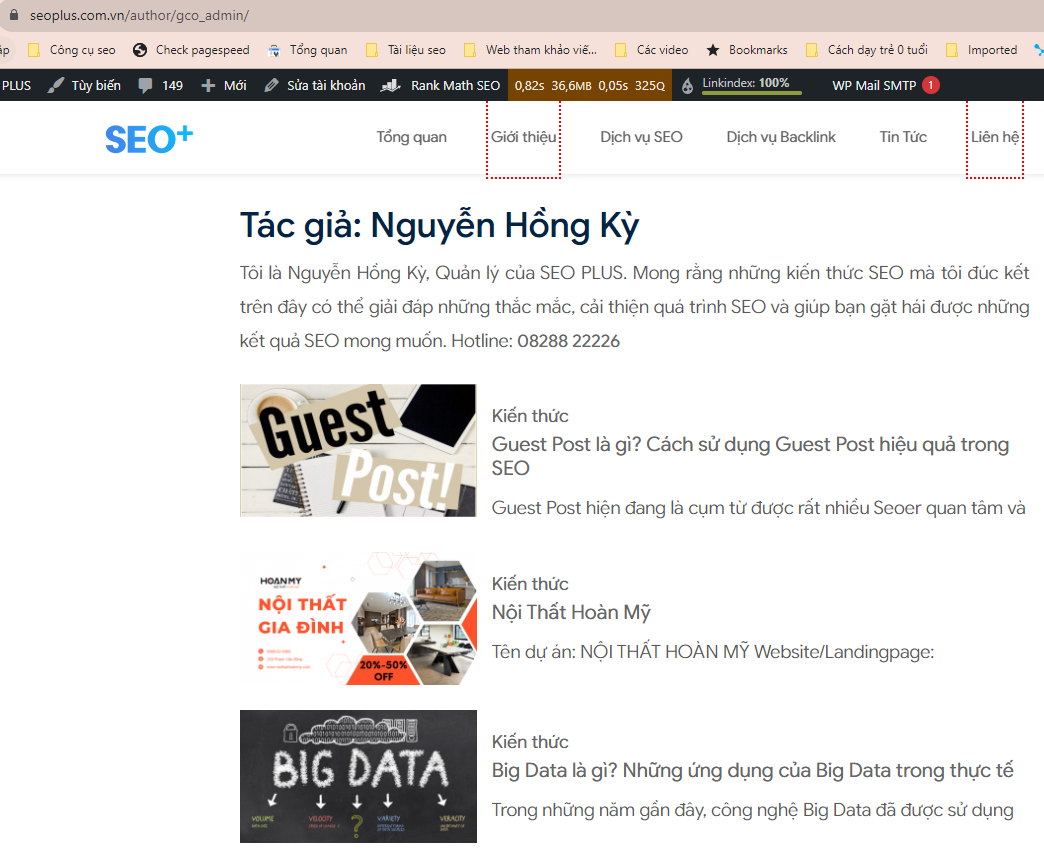
Hình 1: Trang tác giả của SEOPLUS
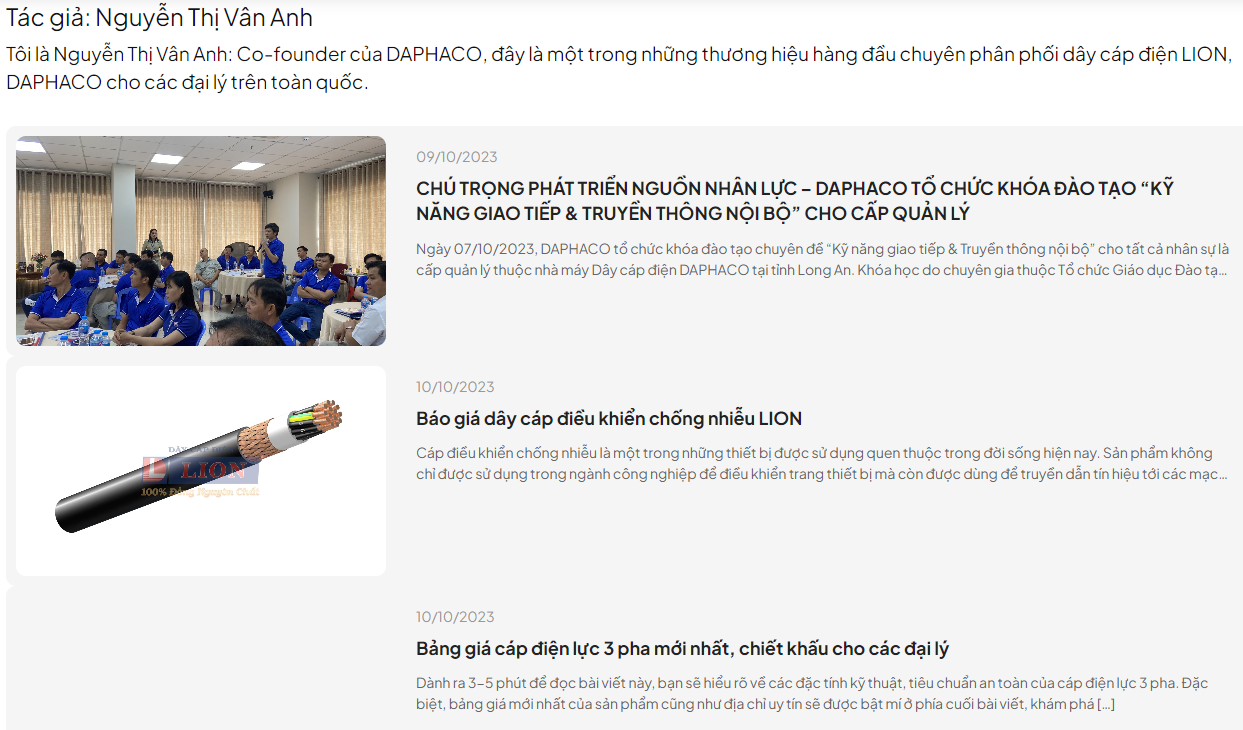
Hình 2: Trang tác giả của DAPHACO
1. Cách hiển thị trang thành viên trên website – Không có ảnh đại diện #
Bước 1: Tạo 1 file author.php
Bước 2: Sau đó copy đoạn code sau và cho vào trong file author.php
<?php
/**
* The template for displaying author page
*
* @author Nguyen Hong Ky
* @since 2023
*/
?>
<?php get_header(); ?>
<main class="main-site main-page main-posts" style="padding-bottom: 50px;">
<div class="main-container">
<div class="main-content">
<article class="lth-posts">
<div class="container">
<div class="row">
<div class="col-xl-12 col-lg-12 col-md-12 col-sm-12 col-12">
<?php
$curauth = (isset($_GET['author_name'])) ? get_user_by('slug', $author_name) : get_userdata(intval($author));
?>
<h2 class="name-author">Tác giả: <?php echo $curauth->nickname; ?></h2>
<div class="desc-author">
<?php echo $curauth->user_description; ?>
</div>
<div class="groups-box_posts_author" style="padding-top: 30px;">
<div class="news-wrap-bottom">
<?php
$user_id = get_current_user_id();
$args = array(
'author' => $user_id,
'post_type' => 'post', // Đảm bảo rằng bạn chỉ lấy bài viết thay vì các loại bài viết khác như trang (page).
'posts_per_page' => -1,
'order' => 'ASC',
'orderby' => 'date',
'posts_per_page' => 5,
'paged' => $paged,
);
$post_small = new WP_Query($args);
$index = 0;
?>
<?php if ($post_small->have_posts()): ?>
<?php while ($post_small->have_posts()):
$post_small->the_post(); ?>
<?php $index++ ?>
<?php if ($index > 0): ?>
<div class="news-figure">
<div class="img-src shine">
<a href="<?php echo get_page_link(get_the_ID()) ?>">
<?php echo get_the_post_thumbnail(get_the_ID(), 'full', array('class' => 'img')) ?>
</a>
</div>
<div class="txt">
<time>
<?php echo get_the_date('d/m/Y', get_the_ID()) ?>
</time>
<h3 class="headline t-18">
<a href="<?php the_permalink() ?>">
<?php the_title() ?>
</a>
</h3>
<div class="caption t-14">
<?php echo get_the_excerpt(get_the_ID()); ?>
</div>
</div>
</div>
<?php endif; ?>
<?php endwhile; ?>
<div class="paginations">
<?php
the_posts_pagination (array(
'prev_text' => '<span class="screen-read-text">' . __('Previous') . '</span>',
'before_page_number' => '<span class="meta-nav screen-read-text">' . __('Page') . '</span>',
'next_text' => '<span class="screen-read-text">' . __('Next') . '</span>',
));
?>
</div>
<?php endif; ?>
<?php wp_reset_postdata(); ?>
</div>
</div>
</div>
</div>
</div>
</article>
</div>
</div>
</main>
<?php get_footer(); ?>
Bước 3: Sau đó truy cập vào host chứa bộ code web tải file author.php lên ngang với file head.php như hình dưới đây:
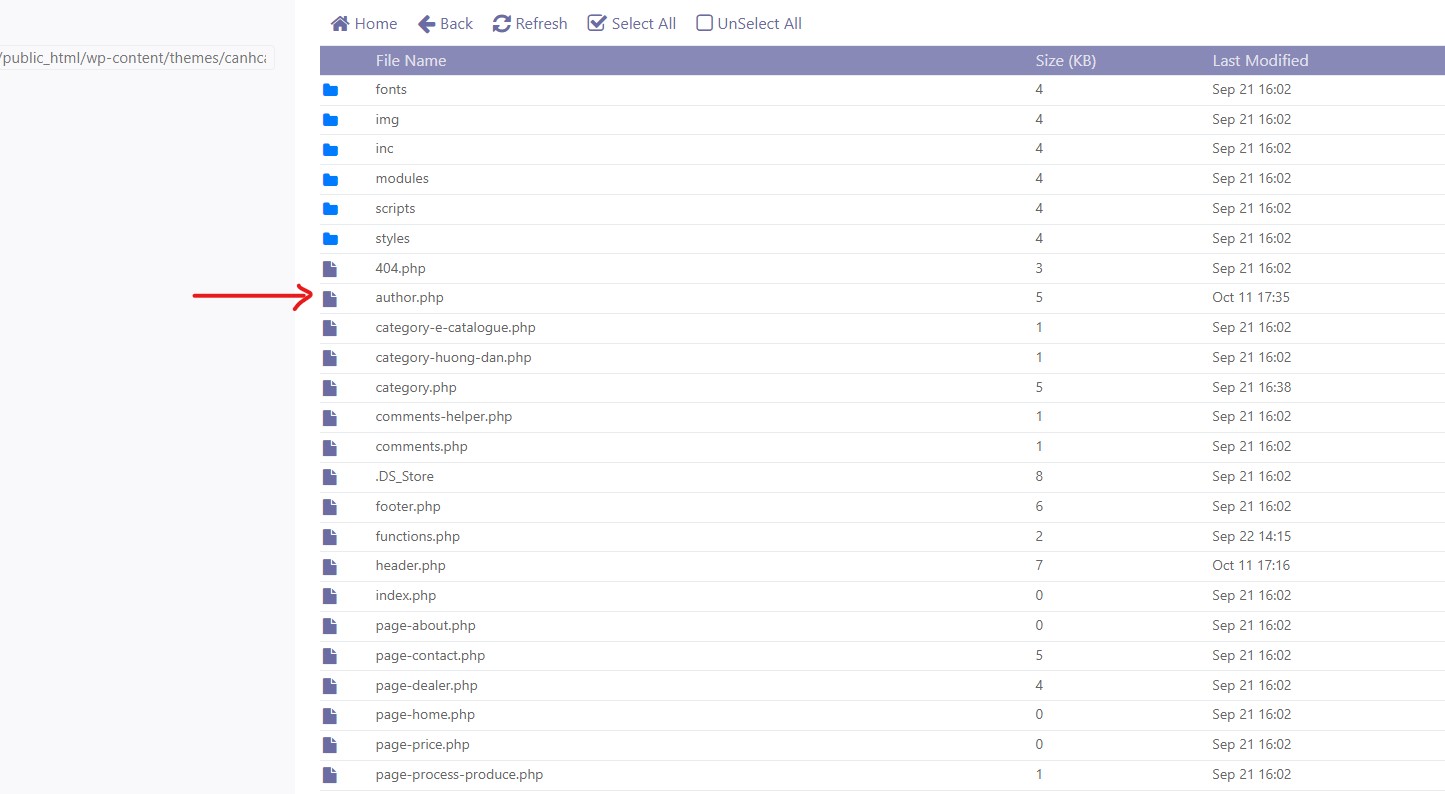
Như vậy là đã xong, giờ các bạn vào trang quản trị ==> Chọn trang thành viên và show kết quả ra xem nhé.
Chúc các bạn thành công.
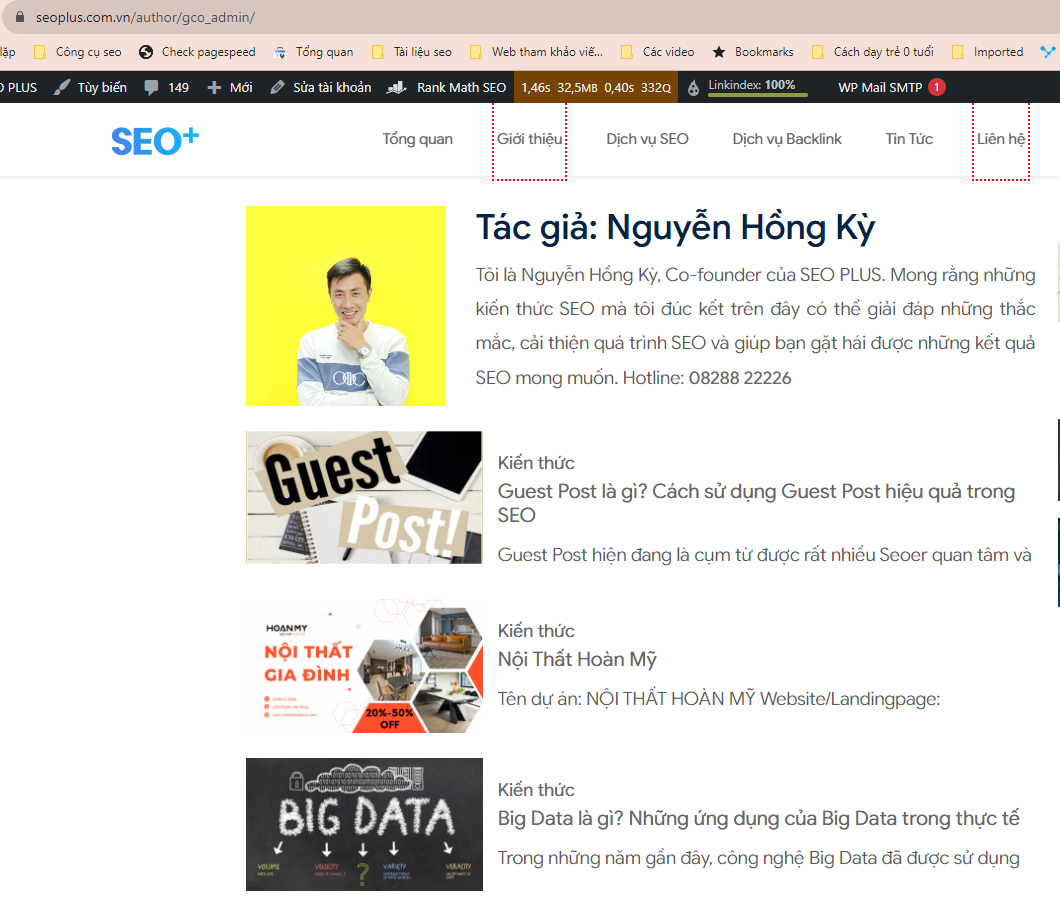
2. Cách hiển thị trang thành viên trên website – Có ảnh đại diện #
Nếu bạn muốn thêm ảnh đại diện cho Author như hình dưới thì làm như sau:
Bước 1: Trong trang quản trị tìm mục: Custom Fields ==> Chọn Add New
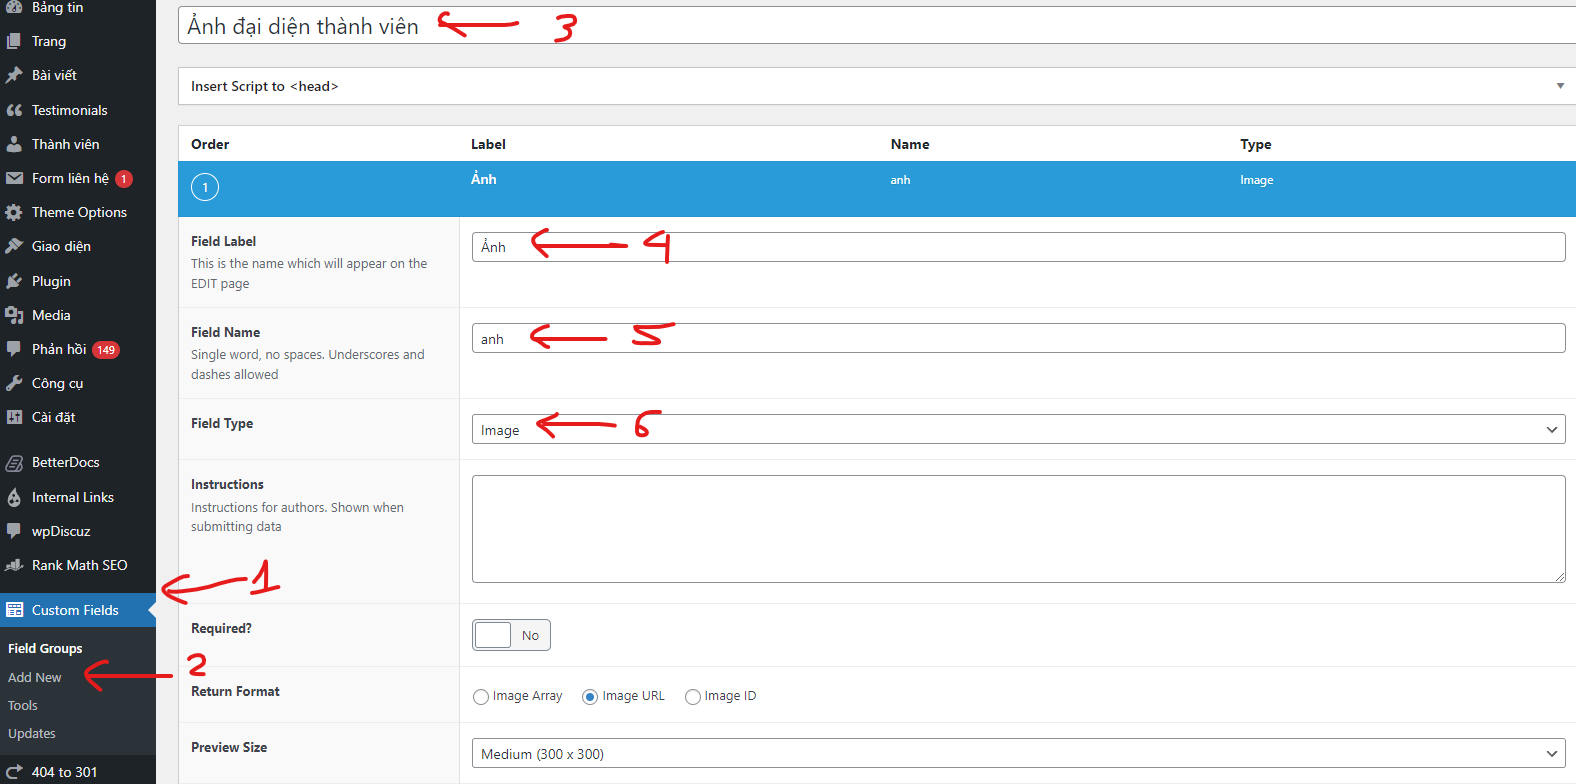
Bước 2: Làm như hình trên
– Đặt tiêu đề: Ảnh đại diện thành viên
– Ở mục: Order: Chọn ” + Add Field ”
Sau đó chỉnh sửa ở mục Order:
+ Field Label: Ảnh
+ Field Name: anh
+ Field Type: Chọn ” Image ”
– Mục ” Location ” chỉnh sửa như sau:
+ Show this field group if: Chọn “User Form” và ” All ”

==> Cài đặt xong thì ấn ” Đăng ”
Bước 3: Tạo 1 file author.php sau đó copy đoạn code sau đây vào file author.php
<?php
/**
* The template for displaying author page
*
* @author Nguyen Hong Ky
* @since 2023
*/
?>
<?php get_header(); ?>
<main class="main-site main-page main-posts">
<div class="main-container">
<div class="main-content">
<article class="lth-posts">
<div class="container">
<div class="row">
<div class="col-xl-8 col-lg-8 col-md-12 col-sm-12 col-12">
<?php
$curauth = (isset($_GET['author_name'])) ? get_user_by('slug', $author_name) : get_userdata(intval($author));
?>
<div class="author-box">
<div class="author-image">
<div class="image-author">
<img src="<?php echo get_field( 'anh', 'user_' . $curauth->ID ); ?>" alt="<?php echo $curauth->nickname; ?>" />
</div>
</div>
<div class="author-content">
<h2 class="name-author">Tác giả: <?php echo $curauth->nickname; ?></h2>
<div class="desc-author">
<?php echo $curauth->user_description; ?>
</div>
</div>
</div>
<div class="groups-box_posts_author">
<?php
if (have_posts()) { ?>
<?php while (have_posts()) {
the_post(); ?>
<div class="item-posts_author">
<?php
//load file tương ứng với post format
get_template_part('template-parts/post/content-author', get_post_format());
?>
</div>
<?php } ?>
<?php require_once(LIBS_DIR . '/paginations/pagination.php');
} else {
get_template_part('template-parts/post/content', 'none');
}
?>
</div>
</div>
<div class="col-xl-4 col-lg-4 col-md-12 col-sm-12 col-12">
<div class="sidebars">
<!-- Sidebar -->
<?php if (is_active_sidebar('sidebar_blogs')) { ?>
<aside class="lth-sidebars">
<?php dynamic_sidebar('sidebar_blogs'); ?>
</aside>
<?php } ?>
</div>
</div>
</div>
</div>
</article>
</div>
</div>
</main>
<?php get_footer(); ?>
Bước 4: Chỉ CSS lại 1 chút là ok, bạn vào file customs.css rồi thêm đoạn code sau:
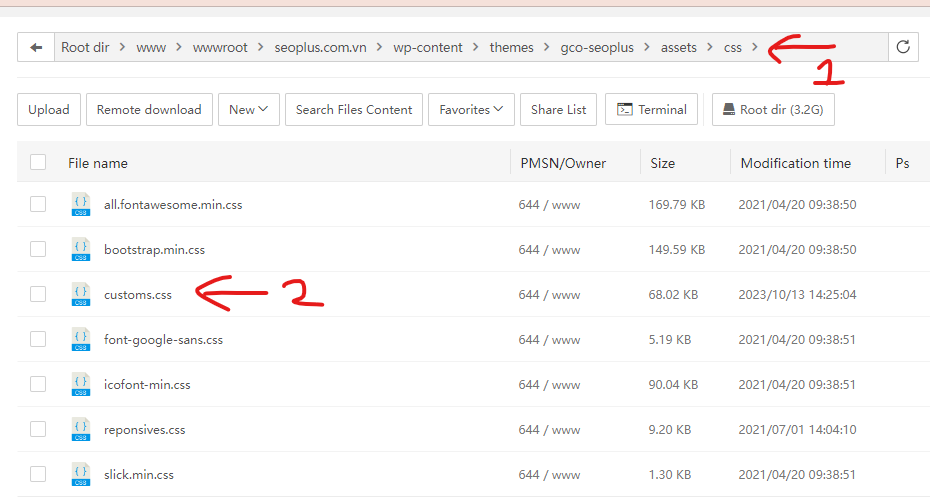
( File customs.css nằm trong thư mục này: /www/wwwroot/seoplus.com.vn/wp-content/themes/gco-seoplus/assets/css/customs.css )
.author-box {
display: flex;
flex-wrap: wrap;
margin: 0 -15px;
}
.author-box .author-image {
max-width: 230px;
padding: 0 15px;
}
.author-box .author-content {
max-width: calc(100% - 230px);
padding: 0 15px;
}
@media (max-width: 767px) {
.author-box {
flex-direction: column;
align-items: center;
}
.author-box .author-content {
max-width: 100%;
margin-top: 30px;
}
}
Bước 5: Lưu file lại và tận hưởng thôi


